Easy Movie Poster: The User Manual

FUNDAMENTAL CONCEPTS


To customize a Movie Poster Template:

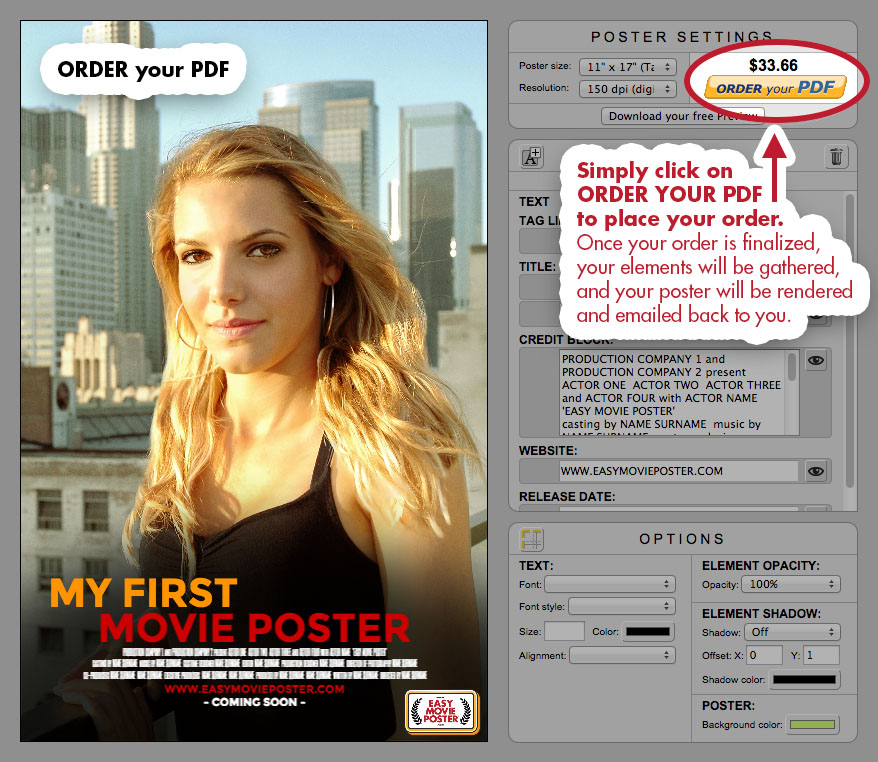
Use the Palette Interface (on the right hand side) to implement all aspects, elements, and characteristics of your poster.
The Preview (on the left hand side) will reflect your changes.


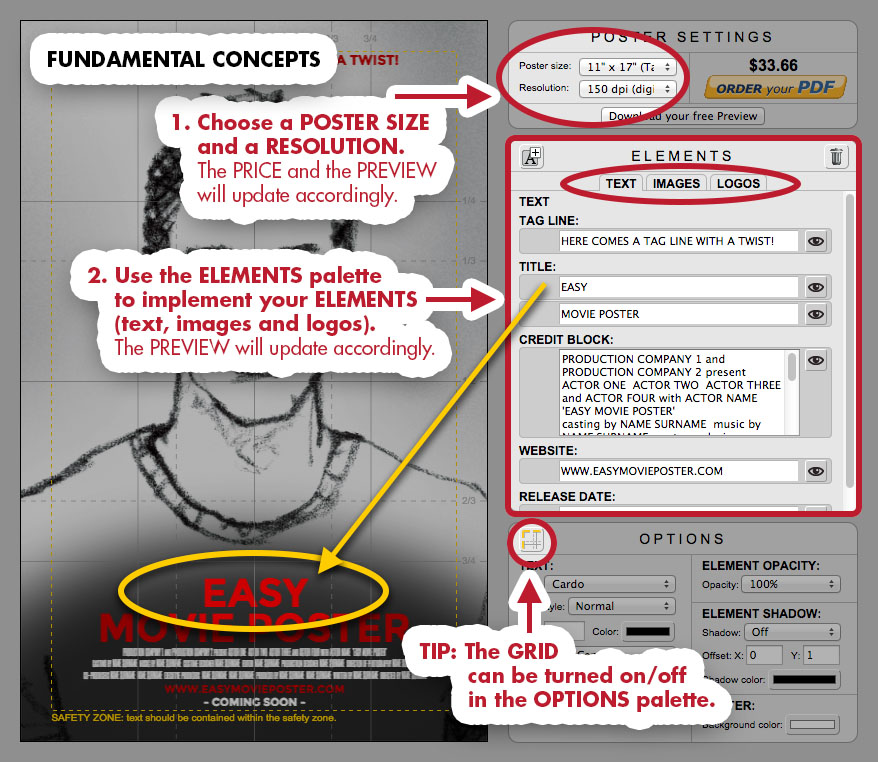
1. First choose a POSTER SIZE and a RESOLUTION.

The PRICE and the PREVIEW will update accordingly.
We recommend starting with these settings, as they are key to composition and sizes.


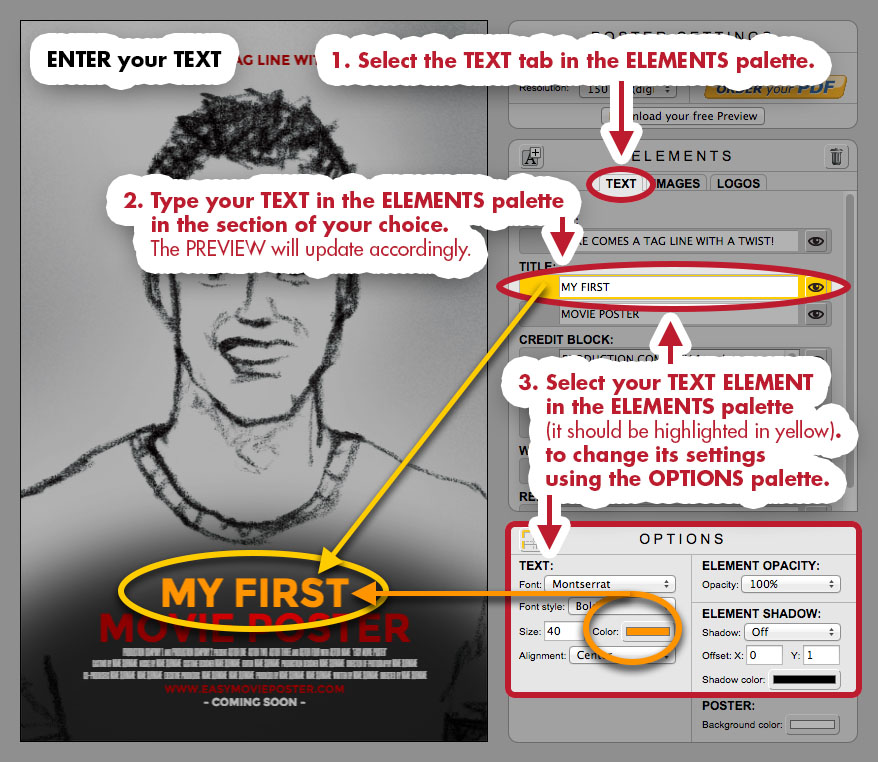
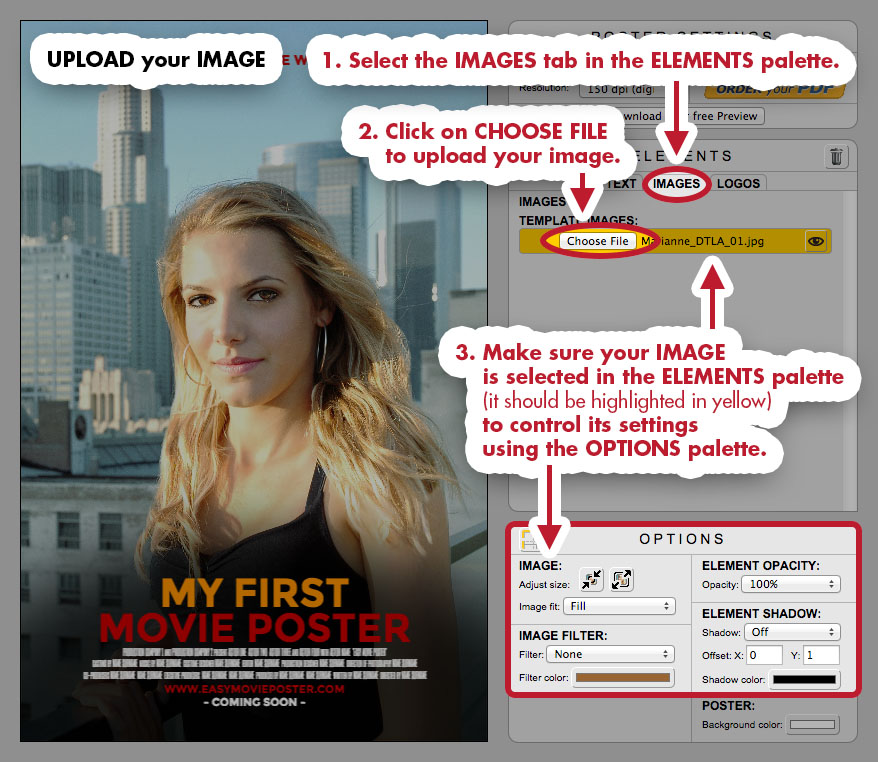
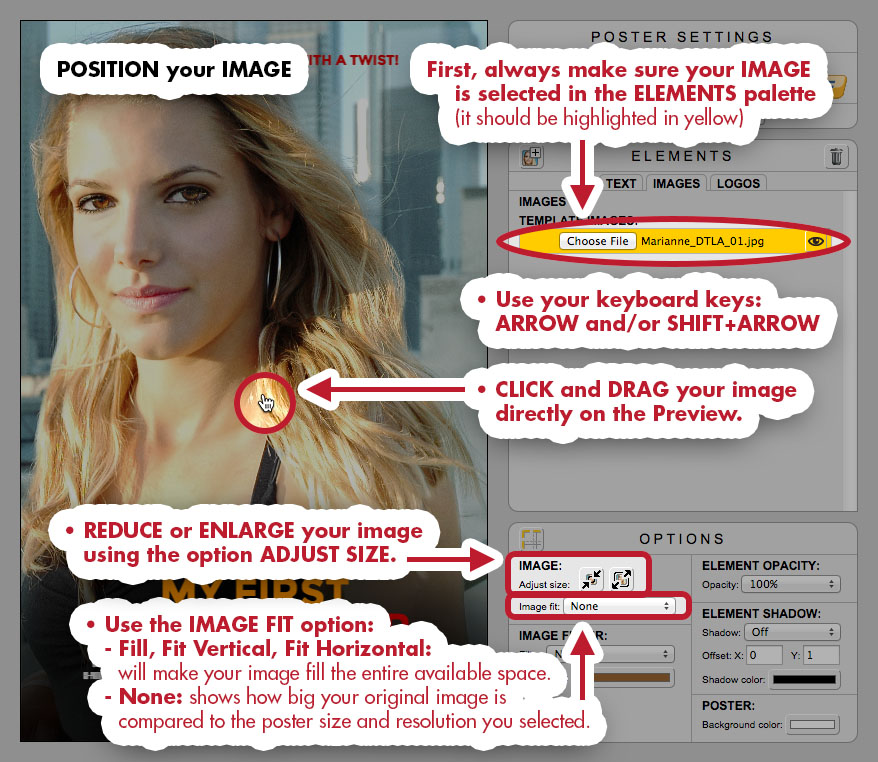
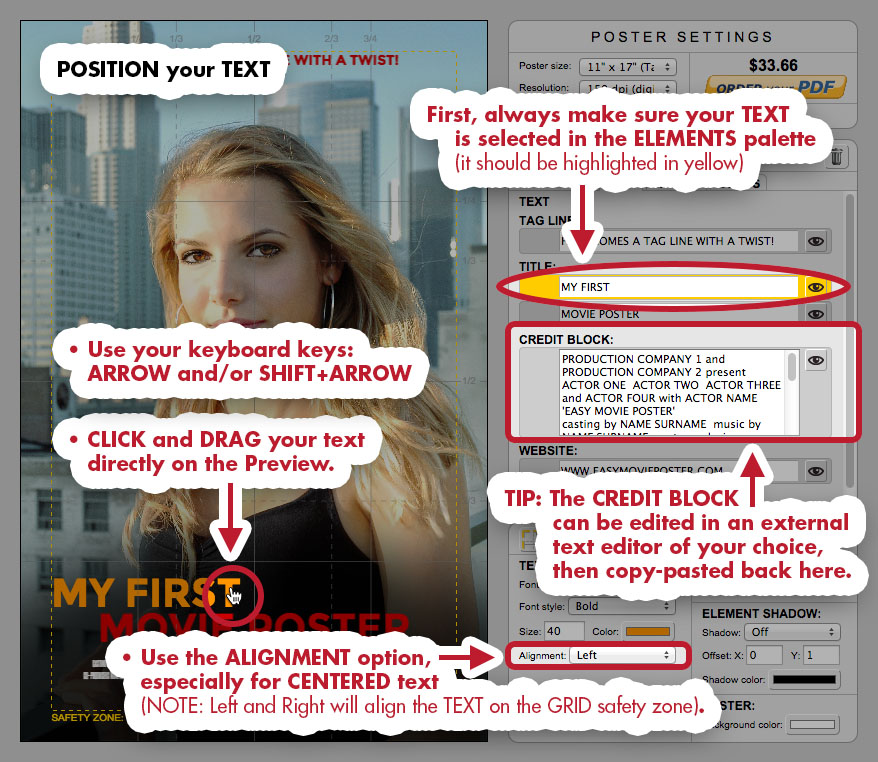
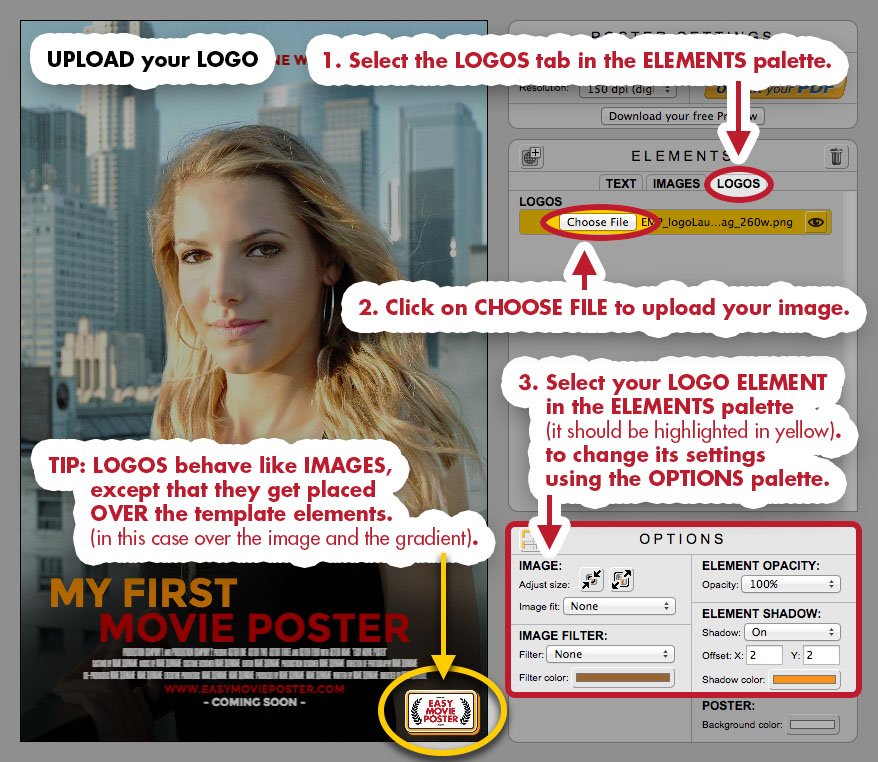
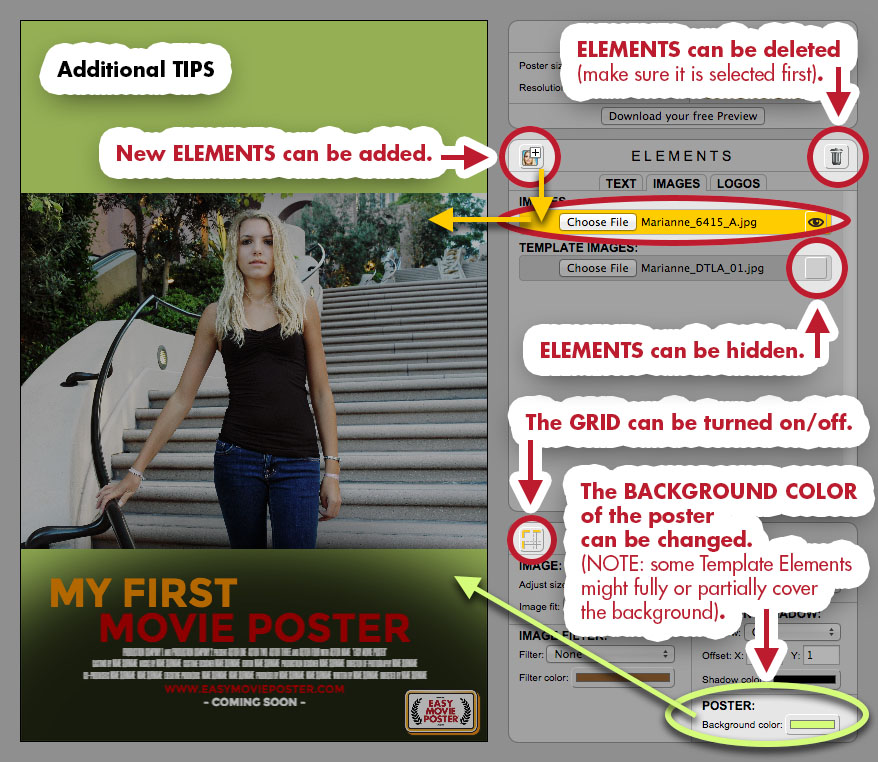
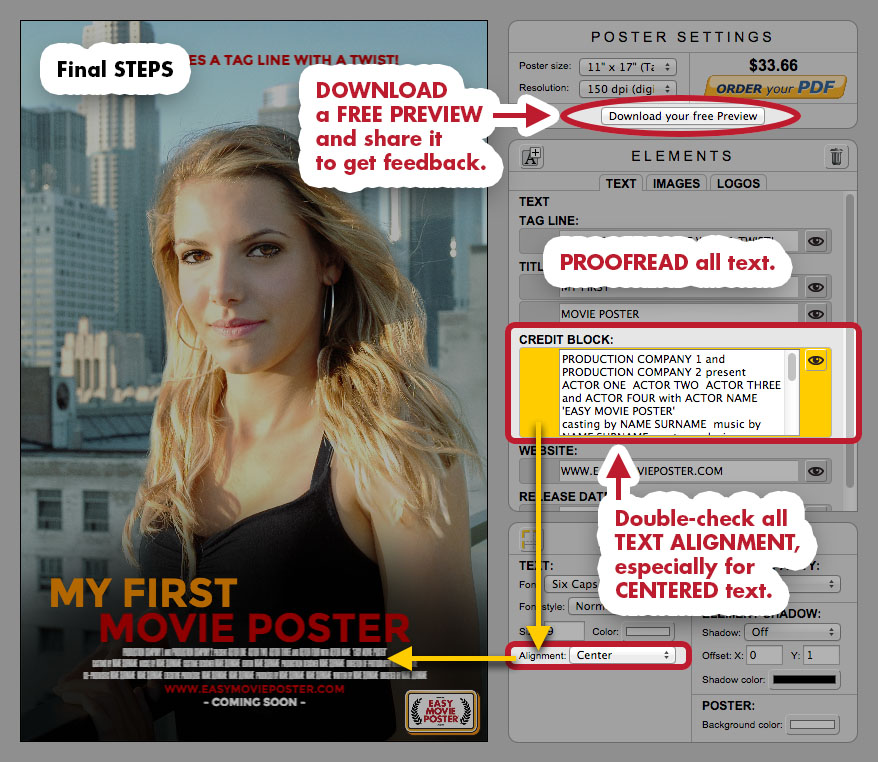
2. Use the ELEMENTS palette to implement your ELEMENTS (Text, Images, and Logos).

The PREVIEW will update accordingly.


TIP: The GRID can be turned on/off in the OPTIONS palette.


Easy Movie Poster - User Manual: Fundamental Concepts

Back to Top

ENTER your TEXT


Use the ELEMENTS PALETTE to enter your text:


1. Select the TEXT tab in the ELEMENTS palette.


2. Type your TEXT in the ELEMENTS palette in the section of your choice.

The Movie Poster Template offers distinctive sections such as "Tagline" or "Title" that have predefined setups.
Enter your Text in each of those. You can hide (click on the EYE icon) any field you don't intend to use.
The PREVIEW will update accordingly.


3. Select your TEXT ELEMENT in the ELEMENTS palette to change its settings using the OPTIONS palette.

Make sure the ELEMENT you want to work on is selected in the ELEMENTS palette (it should be highlighted in yellow).
You can change the Font, the Font Style, the Size, the Color and the Alignment of the Text. You can also change the Element Opacity, and the Element Shadow.
The PREVIEW will update accordingly.


Easy Movie Poster - User Manual: Enter your Text

Back to Top

UPLOAD your IMAGE


Use the ELEMENTS PALETTE to upload your image:


1. Select the IMAGES tab in the ELEMENTS palette.


2. Click on CHOOSE FILE to upload your image.

The Movie Poster Template offers predefined sections for images.
Upload your images in each of those. You can hide (click on the EYE icon) any section you don't intend to use.
The PREVIEW will update accordingly.


3. Select your IMAGE ELEMENT in the ELEMENTS palette to change its settings using the OPTIONS palette.

Make sure the ELEMENT you want to work on is selected in the ELEMENTS palette (it should be highlighted in yellow).
You can change the Size, how the image Fits or Fills a section, and add a Filter and a Filter Color. You can also change the Element Opacity, and the Element Shadow.
The PREVIEW will update accordingly.


Easy Movie Poster - User Manual: Opload your Image

Back to Top

POSITION your IMAGE


First, always make sure your Image is selected in the ELEMENTS palette.

It should be highlighted in yellow.
Then you can use any of these techniques to position your image.


• Use your keyboard keys: ARROW and/or SHIFT+ARROW to move your image precisely.


• ClICK and DRAG your image directly on the Preview.


• REDUCE or ENLARGE your image using the option ADJUST SIZE.


• Use the IMAGE FIT option.

- Fill, Fit Vertical, Fit Horizontal: will make your image fill the entire available space.
- None: shows how big your original image is compared to the poster size and resolution you selected.


TIP: if your image is too small compared to the poster size you have chosen, it will most likely render pixelated. To avoid that, we would recommend to use a higher-resolution image instead.


Easy Movie Poster - User Manual: Position your Image

Back to Top

POSITION your TEXT


First, always make sure your Text is selected in the ELEMENTS palette.

It should be highlighted in yellow.
Then you can use any of these techniques to position your text.


• Use your keyboard keys: ARROW and/or SHIFT+ARROW to move your text precisely.


• ClICK and DRAG your text directly on the Preview.


• Use the ALIGNMENT option, especially for CENTERED text.

(NOTE: Left and Right will align the TEXT on the GRID safety zone).


TIP: The CREDIT BLOCK can be copy-pasted in an external text editor of your choice, so you can easily replace the text by yours, and copy-paste it back here.


Easy Movie Poster - User Manual: Position your Text

Back to Top

APPLY an IMAGE FILTER


1. Select your IMAGE in the ELEMENTS palette

Always make sure the ELEMENT you want to work on is highlighted in yellow.


2. In the OPTIONS palette, choose a FILTER and a FILTER COLOR.

BOTH the Filter and the Filter Color you choose will affect the image.


Easy Movie Poster - User Manual: Apply an Image Filter

DESCRIPTION of each IMAGE FILTER


The Image Filters below have all been applied in combination with the same sepia Color Filter, which is the color offered by default.

Feel free to try other Filter Colors, as they will change the way the Filters interact with your image.


Roll-over the vignettes below to learn more about how each Filter works.

Back to Top

ADDITIONAL TIPS


New ELEMENTS can be added:

Click on the icon on the top left corner of the ELEMENTS palette to add a Text, Image, or Logo Element.


ELEMENTS can be deleted:

Make sure the Element you want to delete is selected (it should be highlighted in yellow).


ELEMENTS can be hidden:

Use the EYE ICON to hide or display any Element.


The GRID can be turned on/off:

The Grid is of great help to align elements and build solid compositions.


The BACKGROUND COLOR of the poster can be changed.

NOTE: The background may be partially or fully covered by some Template Elements.


Easy Movie Poster - User Manual: Additional Tips

Back to Top

FINAL STEPS


DOWNLOAD a FREE PREVIEW and share it to get feedback.

It's always good to have a fresh set of eyes take a look at your work.


PROOFREAD all text.

Several times. If possible, ask someone else to take a look as well.


Double-check all TEXT ALIGNMENT, especially for CENTERED text.

Text might get off center during the process, so just make sure it is properly aligned at the very end.


Easy Movie Poster - User Manual: Final Steps

Back to Top

ORDER your PDF


Simply click on ORDER YOUR PDF to place your order.

Once your order is finalized, your elements will be gathered, and your poster will be rendered and emailed back to you.


Easy Movie Poster - User Manual: Order your PDF

Back to Top

You're all good to go! Have fun!